31 December, 2011

Chicken Curry with White Rice.

Hello hello! I just wanted to share my favorite dish of all time: chicken curry. Among southern Chinese, curry is a very popular home dish that is very easy to make with minimal ingredients. In this recipe, you only need two main ingredients and some spices. Simple, yes? Exactly. It's a very quick and easy meal that serves plenty. This is great for lunch and/or dinner (in my case both) in which leftovers are very welcomed.

Ingredients:
1.) 3 large russet potatoes
2.) ~1.5 cups of cubed or diced chicken breast (I used the meat from the hindquarter of the chicken)
3.) 2 tbsp of curry
4.) salt and pepper to taste
5.) ~1-1.5 cups of chicken stock

Directions:

1.) Season the chicken bits with salt, pepper, and 1 tbsp of curry powder. Mix to evenly coat the pieces.
Season the chicken first so it can marinate. 
2.) Wash, peel, and dice the potatoes into half inch chunks (you can cut them as big or small as you want but just adjust cooking time accordingly). Add to a pot of boiling water and let the potato bits cook until soft. (For this recipe, I cooked them in the skillet I'm using to cook the dish since it's one less thing to wash.) Drain potatoes once soft.
After the potatoes are soft (~8 minutes), remove and drain.
3.) In a hot skillet, add a small about of oil and add chicken. Sauté the chicken for about a minute and half and potato bits and stir. Add salt and pepper.
Sauté the chicken for about a minute before adding potatoes.
Once the chicken has cooked for about a minute or so, begin adding potatoes.
4.) Add 1 tbsp of curry powder and chicken stock. Continually stirring, let the chicken stock evaporate. Depending on how you dry you want your curry (in this dish, this is a bit drier than I would normally make it), add more chicken stock for more moisture (or sauce) or less for a drier version. Once the stock as evaporated, remove from heat and serve with white rice.
Add about 1 tbsp of curry powder and a cup of chicken stock. Let the chicken stock evaporate.
Cook until the stock as evaporated. 
Best served with white rice. Very delicious. 
Close up of final product. 
Afterthoughts: This is actually the first time I've actually made curry chicken this dry since usually I like a thicker, saucier curry. This is just as good though and a lot of quicker. I can put up a thicker, saucier version some other time also. Mirepoix can also be added to this recipe, but traditionally it is just chicken and potatoes. This is just excellent with rice. I hope you enjoy.

Costs:
1.) 1 bag of russet potatoes = $0.98 so 3 potatoes = $0.15
2.) Chicken = $1.00
3.) Spices = $0.20
Total Costs: $1.35 for serving of three

Cornmeal Crusted Swai.

I know, I know, after reading the title, I know you're wondering, what the hell is "swai"? Well, for all you fish lovers out there, swai is a commercial bred fish closely related to catfish; except, significantly cheaper. Swai is often found in Asian markets, such as mine, and make excellent substitutes for catfish. I like it in particular for its attributes of sweet, soft, flakiness. It is also significantly cheaper! A whole bag of frozen swai filets (6) is about two dollars. In this recipe here, I'm only using half a filet which was already large for a meal. So, sit back, read, and cook. I hope you enjoy.

Ingredients:
1.) 1 Swai filet
2.) 3/4 cup of yellow cornmeal
3.) 4 tbsps of all purpose flour
4.) 1/2 tbsp of cayenne pepper
5.) 1/2 tbsp of paprika
6.) salt and pepper
7.) 1 egg
8.) 1/4 cup of 2% milk (any milk is fine also)
9.) 1/3 cup of oil to fry

Directions:
1.) Coat filet with salt, pepper, cayenne pepper, and paprika. Then coat with flour. Ensure that the entire filet is coated in flour. This helps the egg cling to the fish.
Always flour, egg, then cornmeal to create a nice crust.
2.) Break and beat the egg. Add milk to soften the mixture. Dip flour coated filet into egg mixture. Coat entire filet.
3.) Dip filet into cornmeal ensuring that the filet is thickly coated. Place into hot oil to fry.

Add to hot oil once thickly coated.
4.) About 3-4 minutes a side, depending how thick the filet is, turn filet with spatula until the cornmeal is gold. Remove from heat and let the filet cook on a rack. Remove and serve.
After 3-4 minutes, turn the filet over. Remove from oil once the cornmeal is golden brown.
Remove from oil and place on try to cool. This prevents sogginess!
I served it with my arroz sucio recipe :D It was delicious. 
 Afterthoughts: It was delicious. Surprisingly, even for half a filet, it was extremely filling. I loved the arroz sucio that I had served it with--it was a great pair. The fish was delicious, sweet, and very crunchy. I must say, it's better to be careful when breading with cornmeal is the fact that it can burn very very easily. Best to always watch the temperature when frying. It would have been also very good with some tartar sauce or dijon mustard. I hope you enjoy!

25 December, 2011

Chicken Udon Soup.

This recipe is to all those udon lovers out there who just want a quick and easy version at home. With only a few ingredients, you can have this lovely bowl of noodles in your kitchen too. I hope you enjoy.

Ingredients:
1.) 1 bouillon cubes (you can use any kind, I'm using chicken)
2.) ~1 cup of chicken stock
3.) ~1.5 cups of water
4.) 1 packet of udon noodles
5.) Enoki mushrooms (as much as you want to add)
6.) Soften tofu (as much as you want to add)
7.) Bean sprouts (as much as you want to add)
8.) Cilantro (as much as you want to add)
9.) 1/4 cup of diced scallions
10.) thinly sliced meat (optional)

Directions:
1.) Bring water and stock to boil. Add bouillon cube and packet of udon. Once the udon has become soften (no longer its original packaging shape), reduce heat.
 
Add 1 packet of udon noodles and a bouillon cube to a pot of  boiling water & stock. 
2.) Begin adding ingredients. Add meat, bean sprouts, mushrooms, tofu, and half of the scallions.
You can add as much ingredients as you please. My favorite is enoki mushrooms :D
3.) Place cilantro at the bottom of serving bowl, remove the udon from heat and serve over the cilantro. Enjoy!
Mix in remaining ingredients and serve.
I personally didn't add meat to mine since I served it with some deep fried shrimp. :]
Afterthoughts: It was really filling and savory. Next time I'm going to try making it with some beef (my favorite) and some fish balls (don't worry, I'll post a pic). This time, I didn't add meat to the noodles just because I had made some deep fried shrimp to go with it, but the shrimp hadn't turned out as well as I wanted to have. But, no worries! I will post the fried shrimp recipe once I make some adjustments. Other than that, it was a great meal. I loved the mushrooms. The great part about this recipe is the fact that it's very versatile. You can basically add anything to the noodles as you please, but do at your own risk i.e. jelly beans >.<. But, I hope you enjoyed this as much as I did. Oh yeah, this serves one. :)

Costs:
1.) 4 packets of (single serve) udon = $2.50 so ~$0.62 for 1 packet
2.) Overall ingredients, mushrooms, scallions, tofu, etc. = ~$1.50
     a.) 1 packet of enoki mushrooms = $0.99 (1/3 was used)
     b.) 1 box of tofu = $1.00 (1/4 was used)
     c.) 1 bag of bean sprouts = $1.09 (1/8 was used)
Total Costs: $2.12 for 1 large serving of udon noodles

24 December, 2011

Conchitas con Leche Dulce.

The sweet tooth is calling again! So here's a delicious dessert that's a great late night dessert with little to no effort at all. This recipe was actually an originally recipe that mother had received from this old old neighbor (who had just arrived from California at the time) of ours back in the old neighborhood when I was just a baby. So after years and years of this delicious dessert, I decided it's time to continue passing on this lovely dessert.

Ingredients:
1.) 3/4 cups of baby shell pasta (you can use regular sized shells but adjust the portion sizes)
2.) 3/4 cups of white granulated sugar
3.) 1 cup of milk (I used 2%, but any kind is welcomed)
4.) 1 cup of water

Directions:
1.) In a (non stick) pot, place water and shell pasta. Bring to a boil and leave on high heat with lid off and continue boiling until the water begins to evaporate. There should be enough water to keep the pasta wet and easy to stir (not to the point of drying out and burning the pasta) but not enough to keep the pasta submerged
I added just enough water to keep the pasta submerged.
Keep the lid off once at a boil until the water evaporates.
2.) Once evaporated, add sugar and stir the pasta around to distribute and melt the sugar. Add milk. Note: If not using a non stick pot, constantly scrape the bottom and sides of the pan since heated milk tends to form a film very easily and burn. Bring the milk to a boil. Remove from heat and serve.
Add sugar, milk, and bring to a boil.

Remove from heat and serve. Here's a close up of the final product.
My apologies for the over exposure due to the white bowl and milk >.<

Afterthoughts: Delicious. This brings back the childhood memories. The pasta is nice and soft while the taste is just sweet and creamy. Best to eat after cooking. Refrigerated pasta never tastes as good as the day before. I personally used shell pasta (conchitas) for two reasons: 1.) My mother used shell pasta for the recipe always while growing up. 2.) The shell shape of the pasta actually traps the sweet milk inside. So when it's in your mouth, the sweet milk spills all over your tastes buds :). Please keep in mind that you're free to use as much or as little sugar as you want. As a kid, I preferred this recipe to a little less sweet but I don't mind as much now. If you also want creamier, best to use a milk that has a higher fat content or just a few tbsps added of cream works too. This serves about 1. I hope you enjoy!

Costs:
1.) 1 bag of baby shell pasta = $0.25 - only 1/3 was used = $0.08
2.) milk & sugar = $0.50
Total Costs: $0.58 for 1 serving

22 December, 2011

Creamy Mashed Potatoers.

Hello hello to all mashed potato aficionados out there! Here's an effortless recipe that you'd sure to love. No mashers or forks needed! =O With just a few russet potatoes and 1 hour, you can have this creamy potato dish in your own home. Serve as you please with whatever you please but, it's best to go with gravy. I hope you enjoy!

Ingredients:
1.) 6 medium Russet baking potatoes (please keep in mind potato size = portion size)
2.) 3/4 stick of butter salted or unsalted (I used unsalted)
3.) 1 cup of diced scallion
4.) 5 cloves of garlic (grated or diced into small bits)
5.) salt and pepper to taste
6.) water to boil

Directions:
1.) Peel and clean potatoes. Tip: To stop potatoes from browning while you peel or cut other ones, just leave them submerged in cold water. Dice potatoes into small pieces. This speeds up the cooking process and makes it easier to mash later on.
The potatoes were sliced into quarters and then 1/4 inch thick pieces. 
2.) Place potatoes in a large pot on high heat. Add enough water to keep the potatoes submerged; about an inch from the top level of potatoes. Bring to boil. Once boiled, keep the potatoes on high heat for ten more minutes until the largest piece you can find is soft. You can try to puncture it with a knife and see if it goes through easy.
4.) Drain potatoes pieces and place in a bowl. Remove as much water as possible. Add slices of butter on top of the potatoes (while steaming hot) and begin mixing with hand mixer set on high. This creates little to no effort at all to mashing potatoes (I told you!) while mixing in the chunks of butter. Ensure that all pieces of incorporated. Add scallions, grated garlic, salt and pepper until all is evenly distributed and incorporated. Serve.
While steaming hot, add slices of butter to drained potato pieces and mix. 
Incorporate all other ingredients and mix until evenly distributed. With a hand mixer, it took about 1 minute to mash.
Quick gravy recipe:
Ingredients:
1.) 1.5 tbsp of flour
2.) fat drippings (in this case, I made baked chicken again and used the drippings from that). If you don't have drippings, half stick of salted butter works just fine.
3.) 1 cup of
4.) 1 tbsp of soy sauce

Directions:
1.) Pour drippings into a sauce pan or skillet on high heat. Slowly add flour to the heated drippings. This makes a roux.  
Add flour and keep stirring. At this stage, this can easily burn.
2.) Add water and soy sauce while constantly stirring. Serve over mashed potatoes.
Add some soy sauce and dilute with water, and you have gravy. :D
Afterthoughts: Very delicious. I wished I had grated the garlic more finely. I just ran the cloves through my food processor and put them in. The good part is that I don't mind the small bits of garlic, but it is a concern for others. The gravy was a little thick, I could have used a little more water but no biggie. This serves about 6-8 people. 

20 December, 2011

Chicken Vermicelli

Yummy yummy yummy! You want something Asian?! Well here it is. This chicken vermicelli dish is going to give you a full tummy and wallet. It also rubs that particular Asian hankering inside ;). With just a few ingredients lying around in my house, I decided to make something creative and fun based off a lovely vermicelli dish made for me by my lovely momma for the past two decades of my life. From her kitchen and mine, here's a dish to keep you happy.

Ingredients:
1.)  2 bundles of Chinese Vermicelli (also called cellophane noodles). There are a large variety of vermicelli such as rice vermicelli and Italian, but make sure you head over to your local Asian supermarket and pick up a pack.
2.) ~1/2 cup of bean sprouts (I just grabbed a fist full)
3.) ~1/2 cup of minced chicken (I minced 1 whole chicken breast)
4.)  ~2 tbsp of sesame oil
5.) ~1.5 tbsp of soy sauce
6.) salt and pepper to taste
7.) ~1/2 tbsp of sugar
8.) ~1.5 tbsp of white or black sesame seeds
Chinese vermicelli usually come in small stiff bundles like these.
Picture Source:  upload.wikimedia.org/wikipedia/commons/d/df/Dongfen.jpg
Directions:
1.) Take the bundles of vermicelli and soak in some warm to hot water. This should soften the vermicelli to cook.
The vermicelli comes in bundles--pictured is two.
Once softened, drain the water. The vermicelli should be stiff, but flexible.
2.) Place half cup of minced chicken in a mixing bowl, add 1 tbsp of sesame oil, 3/4 tbsp of soy sauce, sugar, and a dash of black pepper. Let the chicken marinate for a bit. Note: In this recipe, I'm using regular soy sauce (not low sodium, at all!) so I'm not adding salt to the chicken in this instance since the soy sauce has a lot of salt already.
Diced 1 chicken breast and marinate. I only used half the amount pictured.
3.) Heat up some oil in a wok and add (half) chicken. Remember to move the chicken around to prevent burning, but leave long enough to start browning. Once the chicken starts to brown, add the bean sprouts. Cook both ingredients until the beansprouts start to soften but not become limp.
Heat some oil in a wok.
Cook the chicken. Once, the chicken starts browning, add bean sprouts and cook until soften.
4.) Turn the heat slightly down and add vermicelli. Note: vermicelli cooks very fast and will instantly stick to the bottom of the wok. Keep scraping the bottom of the wok while cooking.
Add vermicelli once the bean sprouts have soften.
The vermicelli took less than a minute to cook. As you can see, the vermicelli sticks to the bottom very easily.
5.) Add a pinch or two of salt and pepper, remaining sesame oil, sesame seeds and soy sauce. Mix ingredients together to create an equal distribution. Remove from heat, top with sesame seeds and serve. Enjoy!
Remove from heat, top with sesame seeds, and serve.

Afterthoughts: In step three, I only added half the chicken I prepped since I didn't want that much chicken in my vermicelli. However, please feel free to add as much or save the remaining chicken for some other time. I also wished I had given more time for marinating the chicken, but it came out rather delicious regardless. This is a rather large portion for one person or a bit small for two, but whichever works for you. I hope you enjoy!

Costs:
1.) 1 packet of vermicelli - has about 8 servings = $1.10 so, ~$0.30 was used
2.) Chicken breast = $0.75
3.) Soy sauce, sesame seeds & oil = ~$1.00
Total Costs: ~$2.05 for about two servings

Black Sesame Soup.

This is a very traditional Chinese dessert which is a variation of "tong sui" (meaning sugar water--or sweet water). As a personal favorite of mine growing up, it's a great dessert for the mid afternoon or after meals--especially during winter. I hope you can love it as much as I can.

Ingredients:
1.) ~1 cup of black sesame seeds
2.) ~1 cup of white granulated sugar
3.) ~1.5 cups of water
4.) ~1 tbsp of starch dissolved in water

Directions:
1.) Using a mortar and pestle, grind the sesame seeds into a fine of powder as possible. The less fine the powder is, the more gritty the soup will be. Tip: One trick to ensure that all the sesame seeds have been crushed is to run the powder through either a cheese cloth or fine sieve. Personally, since I love eating sesame seeds just as, I'm not too concerned with the gritty.
Black sesame seeds! My favorite :D
2.) Place the powder in pot and mix with water. Constantly stirring, add in the sugar. Keep in mind, in this step, you can add as much sugar as you want. Just be careful on going overboard.
Add to pot with water and sugar and bring to boil. As you can see, the dessert is thickening up.
3.) Keep stirring until the soup as come to a boil. If the soup is still too runny (it should be thick like liquid glue), add the starch dissolved in water and keep stirring until the soup is thick. Remove from heat and serve.
I left a fourth of my seeds partially crushed. It loved the texture :D
Afterthoughts: This was such a delicious dessert. Even though I left about a fourth of my seeds partially crushed, it turned out to be a nice texture. This isn't for everyone, but it is for me :]. Mine was a little more soupy than I had intended but overall it was nice. To be honest, the sesame powder can be purchased on a supermarket for a fairly decent price, but the trade off is the fact that it is usually more starch than actual sesame (which then you lose the rich sesame flavour for less work). This serves around two to three people. Enjoy!

Costs:
1 pack of black sesame seeds (which equals to three cups a packet) = $2.50

Homemade Chicken Soup for The Freezing Chicago Winter.

It's almost winter! Insane blizzards, blistering winds, and grueling transportation from your own legs to the bus is just about to arrive! For all you winter lovers and haters out there (I'm a hater), here's a recipe that should warm you up inside regardless of the relationship you have with old man winter. It's a quick and low budget lunch/dinner that will put a smile on your face :)

Ingredients:
1.) ~2.5 cups of mirepoix (meaning diced carrots, onions, and celery). However, due to my incompetency at grocery shopping, I instead just used carrots and onions and upped the portions to cover the celery. I know, shame on me.
2.) 1 large chicken breast
3.) 2-3 chicken bouillon cubes
4.) 3/4 tbsp of oregano
5.) 1/2 cup of macaroni (of your choice, elbow or not. I used wheels)
6.) Salt and pepper to taste
7.) 1.2 tbsp of starch dissolved in three tbsp of water (optional)
8.) ~3.5 cups of water (you can use chicken stock but just adjust the salt content accordingly since most pre-made stocks have high salt content and the bouillon cubes)
9.)

Directions!
1.) Prepare the mirepoix with washing and dicing of the veggies. I must stress: people wash your veggies before consuming!
2.) Dice chicken the chicken breast into cubes and mix with a few pinches of salt and a pinch of pepper. Note: In this step, it's okay to be a little more heavy handed with the salt since I'm using water instead of stock. But, don't go over board. Keep in mind the salt content of the bouillon cubes. Some have higher sodium than others.
Since I didn't have celery, I used one small onion and 1.5 carrots
Dice up the chicken and mirepoix. I used 1/4 cup of macaroni.
3.) In a pot, add some oil on the bottom (olive oil works best) and heat up. Adding the seasoned chicken cubes in, keep the pot on high heat and let the chicken brown a bit. Once the chicken starts to brown, add the mirepoix. Stir the contents.
Add chicken to brown first, then veggies. 
4.) Once the mirepoix soften a bit (you can tell by the onions), add bouillon cubes and oregano. Stir the contents and let the bouillon cubes to start dissolving. Add water (or stock) and bring the pot to a boil with the lid on. This should take about 8-10 minutes.
Once soften, add bouillon cubes and oregano. 
Add either stock or water and bring to boil.
5.) Once at a boil, turn the heat down to a medium and add macaroni. Please keep in mind that you're free to add as much as you please, but these little macaroni bits do double/triple in size. So, even though a 1 bag of macaroni seems insufficient for three people, it is.
6.) [Optional] This is a fairly "thin" soup, so if you want thicker, follow this step: Using ingredient #7, add into soup after it comes to a boil. The starch is diluted first for a reason--it prevents clumping. The starch should be mixed to avoid clumps and then added.
7.) Leave lid on and simmer for about 10 minutes. Remove from heat and serve. Enjoy!
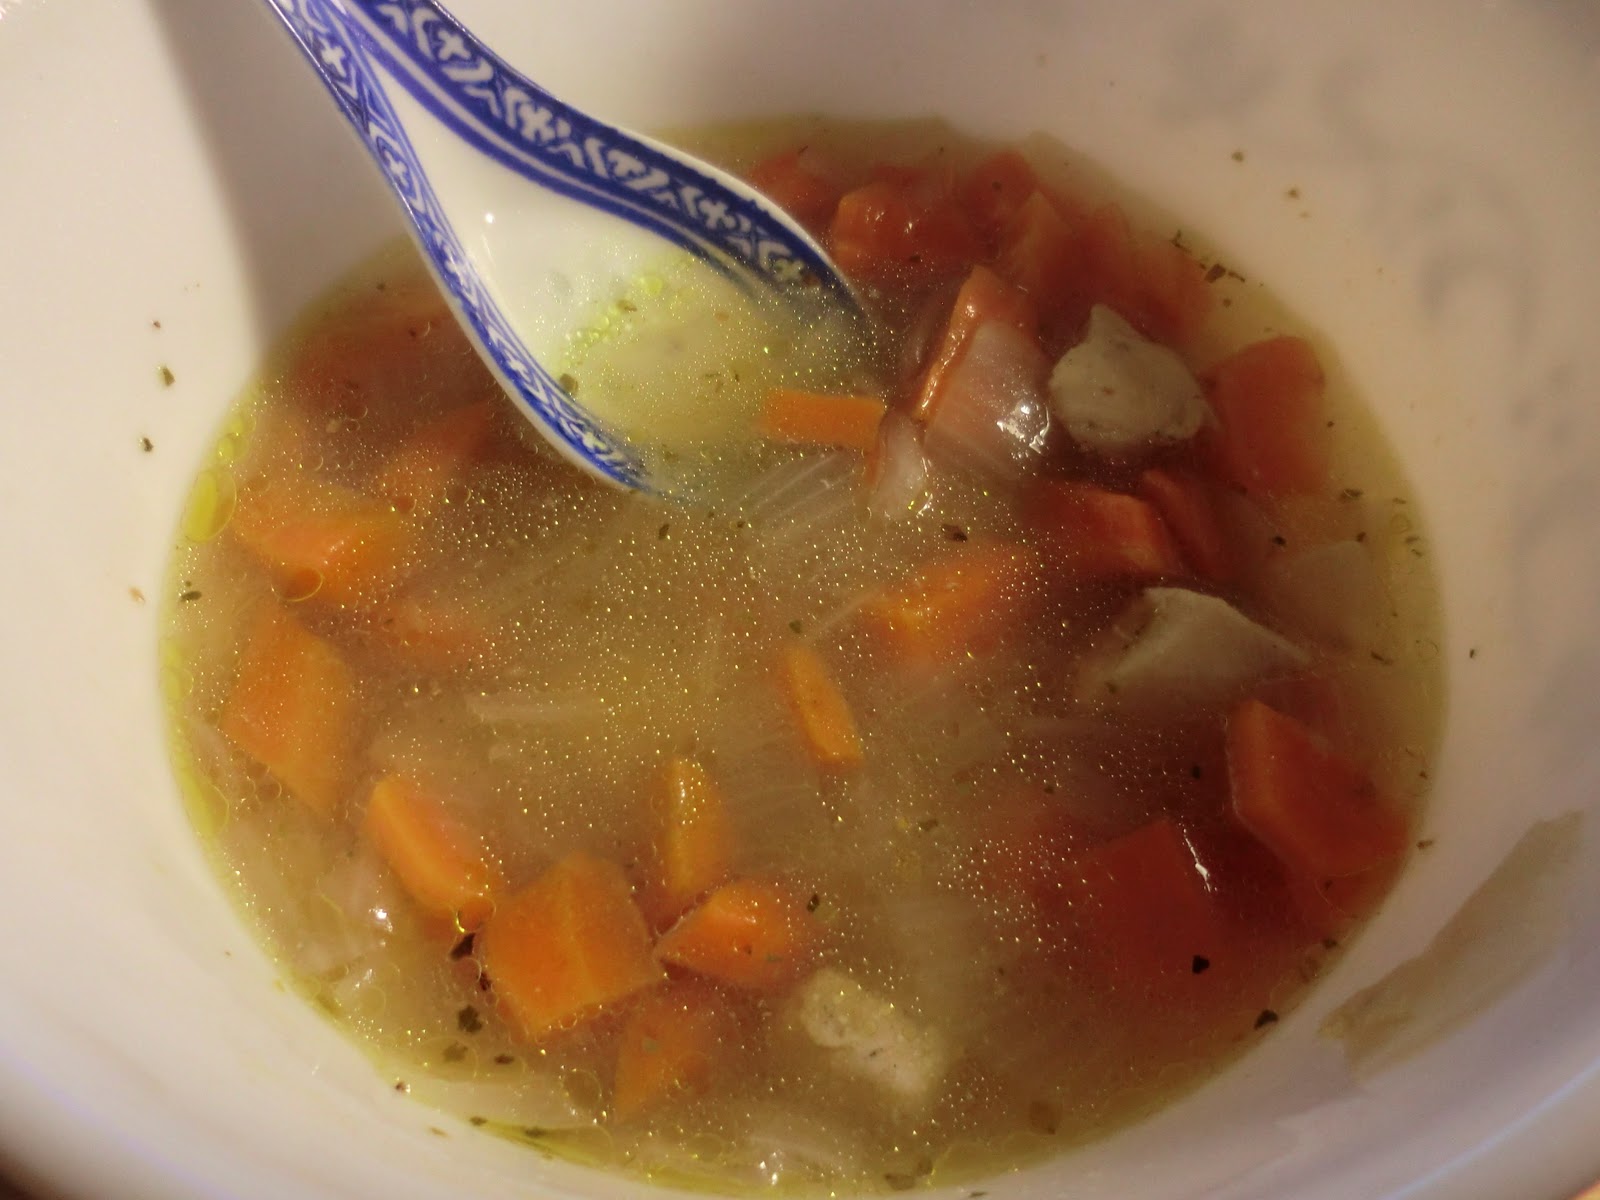
Final product. Fairly easy and delicious.
Close up of final product.
Afterthoughts: This was pretty good. Personally, I'm not a big fan of American soups but this was a nice meal. For me, the salt content and taste worked out just fine for me. I can't say for sure for others (depending on what they're using also). I'm also glad that I didn't put in celery since I'm not a big fan of the cooked kind. This took me less than a half hour to make so it's a good late night meal too. Serves about four people. I hope you enjoy!

Costs:
1.) 1 chicken breast = $0.75
2.) Mirepoix = $1.25
3.) Bouillon cubes & spices = $1.00
Total Cost = $3.00 for a 4 servings.

15 December, 2011

9na's Apple Crumble

This is a very easy crumble for the beginner bakers of the world such as my friend, Juan. My friends Juan, David, and I manage to make and bake this psuedo pie in about an hour and had so much fun doing so! I hope you enjoy it just as much as we did to eat and bake this lovely dessert.

Ingredients:
1.) ~2.5 cups of all purpose flour
2.) 3/4 cup of melted butter (or a stick and half)
3.) ~1.5 cups of brown sugar
4.) ~2 tbsps of cinnamon
5.) 3 medium apples (I used golden apples I had sitting in my fridge for a while)
6.) 1 pie pan (mine was about 8 inches in diameter & 1.5 inches thick)
7.) Ice cream for topping if desired
8.) Whipped cream for topping if desired

Directions:
1.) In a mixing bowl, add flour, 3/4 cup of brown sugar, 1 tbsp of cinnamon, and melted butter. Mix until crumbs form. Pack half of the crumbs into greased pan to create a crust.
Mix flour, brown sugar, and cinnamon to create crumble.
Mix together with melted butter to create crumbs. Make sure the bottom of the bowl is scraped  when mixing to incorporate all flour and butter.
Using a spatula or a flat spoon, pack into a pie pan to form a crust. Ensure that the sides have some crust also.
2.) Peel and slice three apples (and remove the cores) and place in bowl. Mix in 3/4 of a cup of brown sugar and 1 tbsp of cinnamon. Mix until the apples are evenly coated. Spread coated apples over the crust and spread to make an even and uniform layer.
Peel and core apples; I used some apples I had sitting in my fridge which were a bit soft.
Slice apples into 1/4 inch slices. 

Once coated with sugar and cinnamon, place apples into the crust and spread into uniform layer. 
3.) Coat with remaining crumbs an try to cover as much of the apples as possible. Bake at 400 degrees Fahrenheit for about 45 minutes until the top is golden brown. Remove from oven and let the crumble cool and cut. Serve either plain or with ice cream as desired. Enjoy!
Coat with remaining crumbs to cover as much of the apple layer as possible.

Fresh out of the oven crumble. As you can see from the bottom right corner, some of the brown sugar bubbled and peeked out of the crust. 
Let the crumble cool, slice, and serve. I like mine with whipped cream only :D So delicious! Enjoy!
Here was my friend David's second slice--slice of ice cream with pie on top :D
Afterthoughts: Very yummy. Even before we baked it, Juan kept eating the crumbles while the smell of brown sugar and cinnamon wafted through the air. It was so enticing! After a lot of whipped cream and ice cream later, we still had a good portion of crumble left. This recipe serves about four people. I also wished I used dark brown sugar instead of the light brown I used (again, personal preference since I'm a brown sugar fan and love the molasses flavor). This crumble can go well with pecans, walnuts, or any flavor ice cream you desire. This was really fun to eat. I hope you enjoy!

Costs:
1.) Flour, sugar, cinnamon = <$0.60
2.) Apples = 3x$0.20 = $0.60
3.) 1.5 sticks of butter = ~$1.00
Total Costs = $2.20 for a whole pie